 Skip to content
 Long-term food storage requires careful attention. Without a proper food storage strategy, you not only risk the food, but also your business. A little mistake can lead to an unexpected and unaffordable loss. To avoid this mishap, the sealing of Mylar bags for long-term food storage plays a crucial role. It is not as easy as said.
This guide will walk you through the correct method for heat-sealing Mylar bags to ensure optimal long-term food storage. By following these best practices, you can securely preserve your food using mylar vacuum seal bags with confidence and ease.
Each Mylar bag should receive product labels and a date mark before filling it with materials. Permanent markers, along with printed labels, serve the purpose of labeling Mylar bags. It becomes simpler for me to write content on the bag during its empty flat state. Writing the package contents and date on the Mylar bag before filling it enables you to identify contents without needing to open the sealed bag. You will be able to recall the exact date of packaging. Writing contents and date on Mylar bags in step one saves future confusion and significant time.
You should continue with your food distribution into printed mylar bags at this point. The recommended Mylar bag stuffing materials consist of dry food items that should include rice, beans, oats, flour and pasta. The container should not accept food items that contain moisture and oil. Those foods spoil quickly. Allow two to three inches of clearance above the packaged food to ensure the bag can be easily closed and sealed.
Lay the oxygen absorber on top of the food before fully filling the bag with contents. Apply the oxygen absorber to the top of the food before proceeding with the bag’s closing process. Dispose of the absorber packets immediately before using them for bag sealing operations. The oxygen absorbers begin reacting immediately after contact with atmospheric air.
Create a flattening motion on the bag to remove excessive air from inside. Starting from the bottom level, you should press until the top material reaches. Caringly flatten out the bag structure. Better food preservation occurs by removing air from containers. You can select either your arm or a clean bottle to push out air from the bag effectively. Performing the task does not require absolute perfection. Take time to remove as much air from the bag before applying the seal.
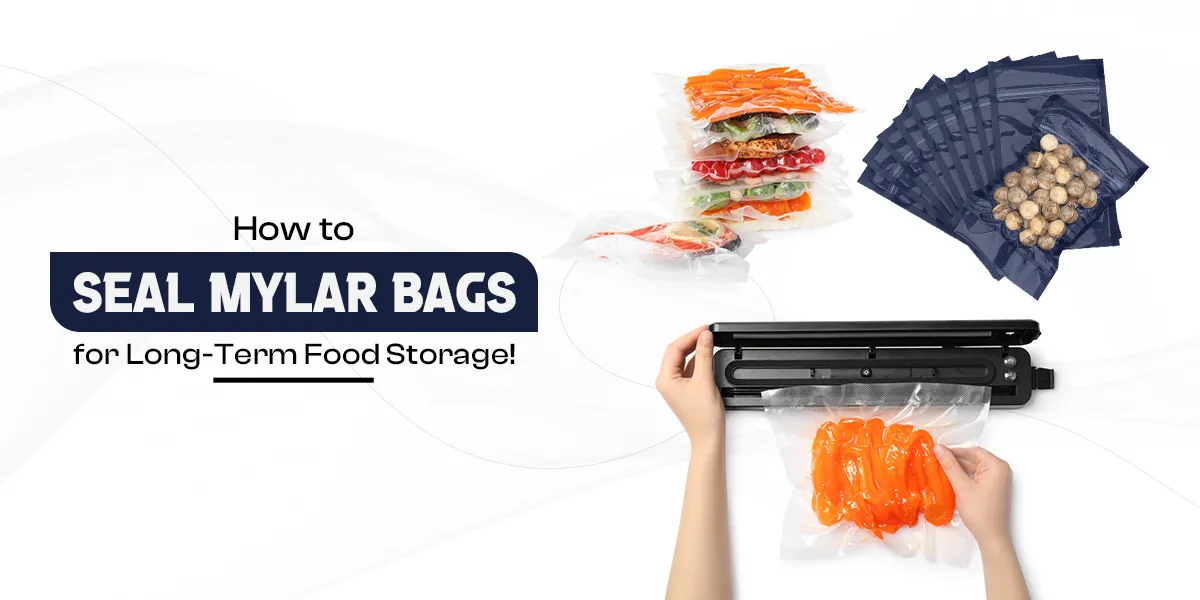
This is the most important part. You can use a hair straightener, a heat sealer, or even a clothes iron. Don’t rush this part. A bad seal can let air in and ruin the food.
Once sealed, keep the bags in a cool, dry place. I like to place them in food-safe buckets or plastic bins. This gives them extra protection from pests or damage. Avoid places with high heat or moisture. A closet, pantry, or basement usually works fine. Check the bags after a few days to make sure they stay sealed and flat. If one bag looks puffed up, it may need resealing or replacing.
Any mylar bag’s seal confirms this fact, whether it will provide strong storage for products with the help of an impulse sealer or not. The impulse sealer is highly effective for sealing PET materials of various thickness ranges, including 2mm, 5mm, and 100mm. The type of packaging itself determines the seal thickness; for example, mylar bags have seal thicknesses of 5mm and 8mm to 10mm. Besides this, polybags have a seal thickness of 2mm.
The thicker the seal, the lower the chances of your bag bursting are very low. For this reason, Mylar bags with a thickness of more than 8mm are considered safe for packing a large amount of product.
There are two types of printing that you can choose for your mylar bags. One is label printing, and the other is direct printing.
In label printing, brands design the label with their brand logo and product information. The labels are available in various sizes and styles, and are considered more affordable than direct printing. These come on either roll or in the form of a flat sheet that you can easily apply to your mylar bags to make them informative and more appealing.
In direct printing, you need to first design the mylar bag template with your desired graphics, colors, and branding elements. During the designing process, you should also choose only those PET materials that support the printing that you want on your mylar bags. In this process, various printing methods are used, including gravure printing, digital printing, offset printing, and screen printing. This is the most effective option and provides a more professional look to mylar bags.
The Mylar bag must be sealed with food inside while adding an oxygen absorber, then carefully squeezing out all the air. Secure the open edge of the bag through treatment with a regular clothing iron.
The proper sealing temperature needed by Mylar bags exceeds the heat capacity of most vacuum sealers, resulting in ineffective bag mounting. Extra sealing methods will be necessary when using Mylar bags. Using oxygen absorbers within the bag proves better than relying on vacuum sealing as a preservation method.
Applying heat through a hair straightener or iron to the top edge of the bag during a several-second period will help properly seal it. Sealing the Mylar bag should be consistent across the length while also providing complete air-tightness.
Place dry food into the Mylar bag, followed by an oxygen absorber, then squeeze out remaining air before heating the bag to make a seal. Heat the top edge of the bag before placing it in a dry bucket alongside additional protective storage containers.
Need more details on long-term food storage using Mylar bags? Our complete guide covers everything you need: Mylar Bags sizes for Food Storage
So, sealing a Mylar bag for long-term food storage is important for the protection and storage of food. Using only a proven strategy is crucial to avoid ruining your food. From gathering your materials and supplies to sealing and storing your bags, you need to use the right steps while sealing your custom printed Mylar bags. Above, I have discussed all the important steps you need to follow. With these steps, you can ensure a safe and secure storage of your food in custom Mylar bags.

Hello, I'm Marilyn Cox, a seasoned packaging consultant and designer. With a professional journey spanning over four years, I've evolved from a budding designer to a recognized expert in the field. Currently holding the position of Packaging Consultant, I've honed my skills in creating not just visually stunning packaging but also solutions that align with strategic business goals.